Optimizing Games for Multiple Screen Resolutions
By Alex Schendel
You may have tested your game on one of your friends’ devices and noticed that everything looked either too large or too small, sometimes comically so. This is due to differences in screen resolutions. Although the physical size of two screens may be nearly identical, they can have radically different screen resolutions, denoted as pixel densities.
Thus, in order to make your game optimized, and even playable on multiple screen densities, a few changes will have to be made to code.
I. Scaling Bitmaps(If you already have your bitmaps in your app)
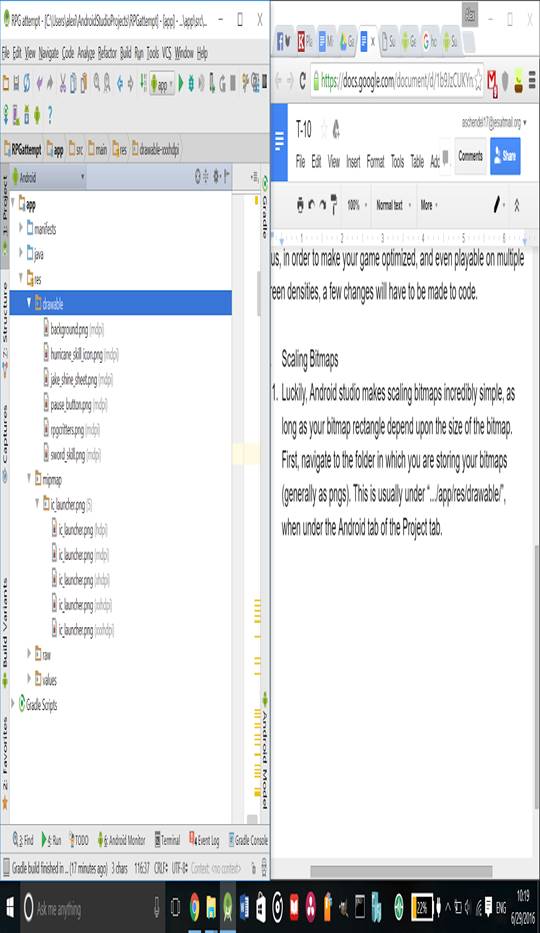
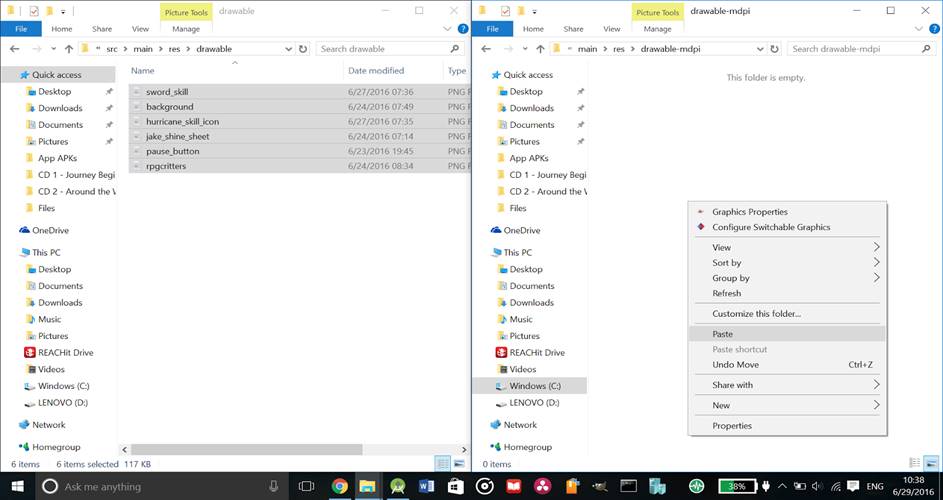
1. Luckily, Android studio makes scaling bitmaps incredibly simple, as long as your bitmap rectangle depend upon the size of the bitmap (using Bitmap.getWidth() and getHeight() methods). First, navigate to the folder in which you are storing your bitmaps (generally as pngs). This is usually under “.../app/res/drawable/”, when under the Android tab of the Project tab.
2. As you can see, under the mipmap directory, the ic_launcher has 5 different directories, signified in gray as (hdpi), (mdpi), (xhdpi), (xxhdpi), and (xxxhdpi). These refer to the different “dots-per-inch” which is another way to measure pixel density. Android uses these different png sizes in order to use the correct size png for different screen resolutions. We can make Android scale our pngs for us if we use a similar technique. To do this, right-click on drawable and select new directory and name it: “drawable-mdpi”.
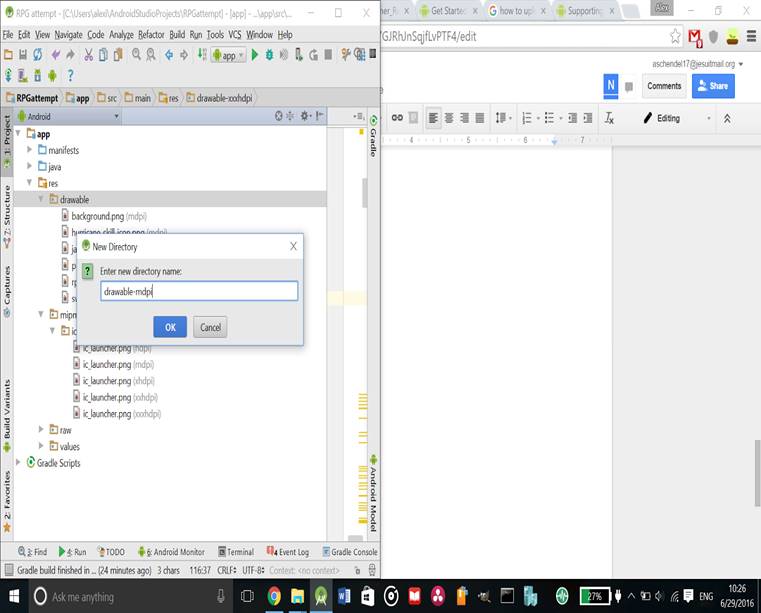
3. The “-mdpi” tells Android that the images in this folder are designated as the “medium dots-per-inch” screens. Thus, when it encounters a screen of any other size it will scale the images appropriately. The next step requires you to find your app’s folder on your hard disk and navigate to the resources(res) folder. By default this would be: C:\Users\<your-username-here>\AndroidStudioProjects\<your-app-name-here>\app\src\main\res
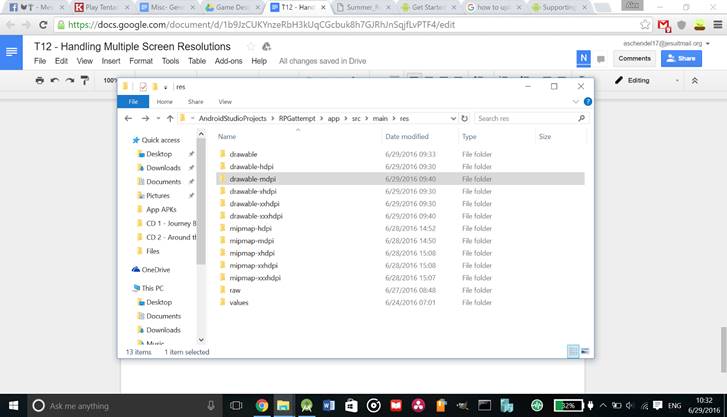
4. Now you’ll notice there are five new folders! Although you only added “drawable-mdpi”, Android took notice of this and added the other four for you, how considerate of them. Now you need to move all of your existing bitmaps from your drawable folder to your drawable-mdpi folder.
5. Now, when you test you app on any device, the sprites will be the same size no matter what!
NOTE: If the sprites are too large, try moving the images to one of the higher density folders, such as drawable-hdpi. If they are too small, then you will have to manually adjust the size using a photo editor such as GIMP.
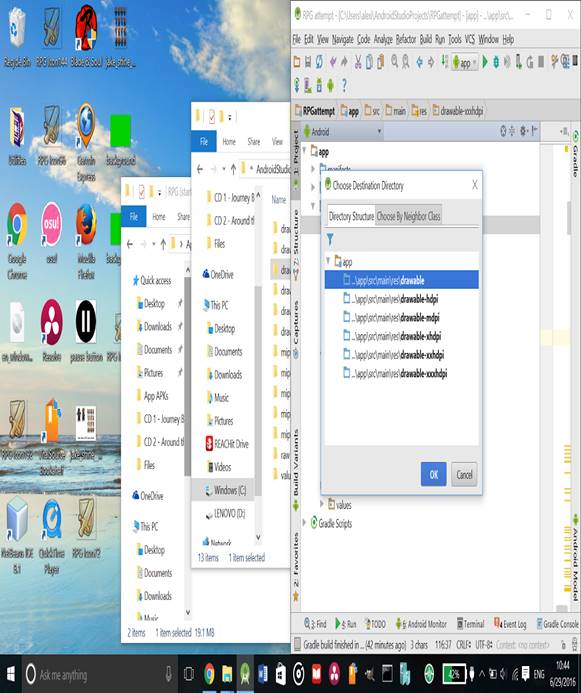
NOTE FOR THOSE WHO HAVE NOT STARTED THEIR PROJECT: Before you put any images into your project, do the first two step and then you will be prompted every time you insert an image to “choose a destination directory” this will allow you to put your images in their respective folders without using your file manager to find the data files on your hard disk.
Final NOTE: If you wish to maximize image quality, then use a large image and manually scale the size to the proper proportions and paste them in their respective density folders.
II. Adjusting EVERYTHING else (Most easily done on a new project)
1. This is the more difficult part when dealing with multiple screen sizes, because it it something that must be done manually. This involves using the SCREENWIDTH and SCREENHEIGHT variables exclusively when managing the sizes of objects such as rectangle and text and character movement speeds. Below is an example of defining rectangles based upon screen variables.

Good Job! Continue this practice and you will be ready to create an app for Google Play!